How to tie the Sheet bend
The sheet bend joins two ropes, including ropes of different sizes. Put the bight in the thicker rope, tuck the thinner end under itself, and check both tails.
- Type
- Bends
- Difficulty
- Easy
- ABOK number
- #1431
- Also known as
- Weaver’s knot
- Best for
- General rope work, Camping
Use the thicker rope for the bight; if the ropes match, either can form it.[1]
This is a rope join, not a binding knot for tightening around a parcel.[1]
Step-by-step: tying the Sheet bend
-
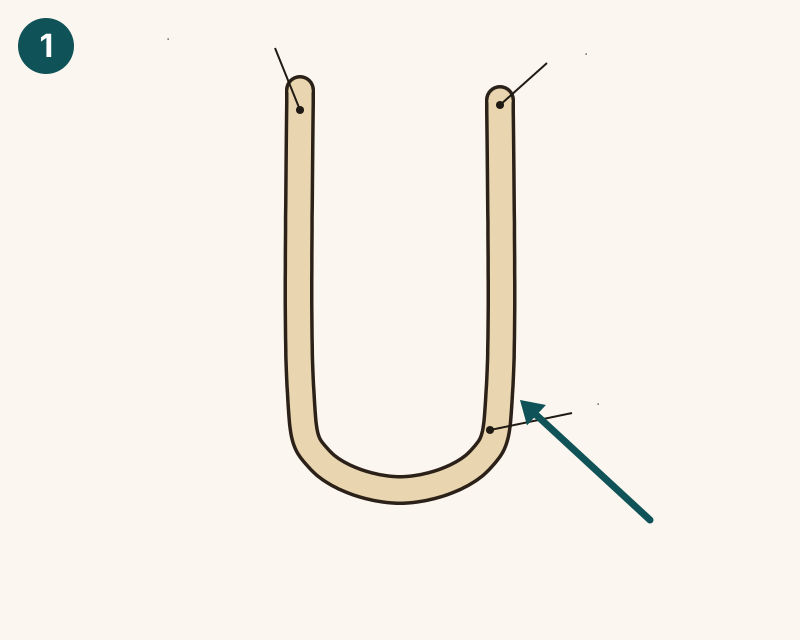
Step 1: Fold the thicker rope
Make an open bight in the thicker rope. Do not twist it into a crossing loop. Leave a generous tail.
-
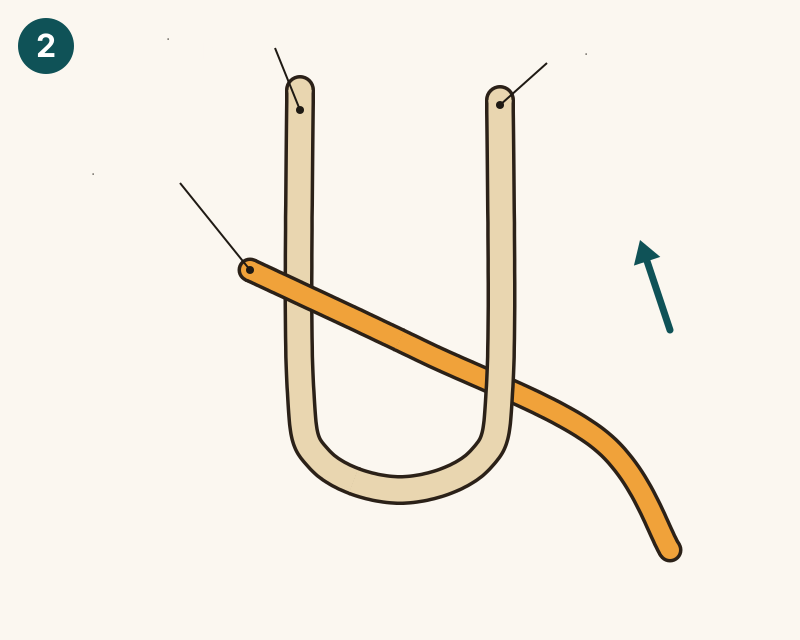
Step 2: Pass the thinner end through
Bring the thinner working end up through the bight from underneath. In this view it passes under the right leg and over the left.
-
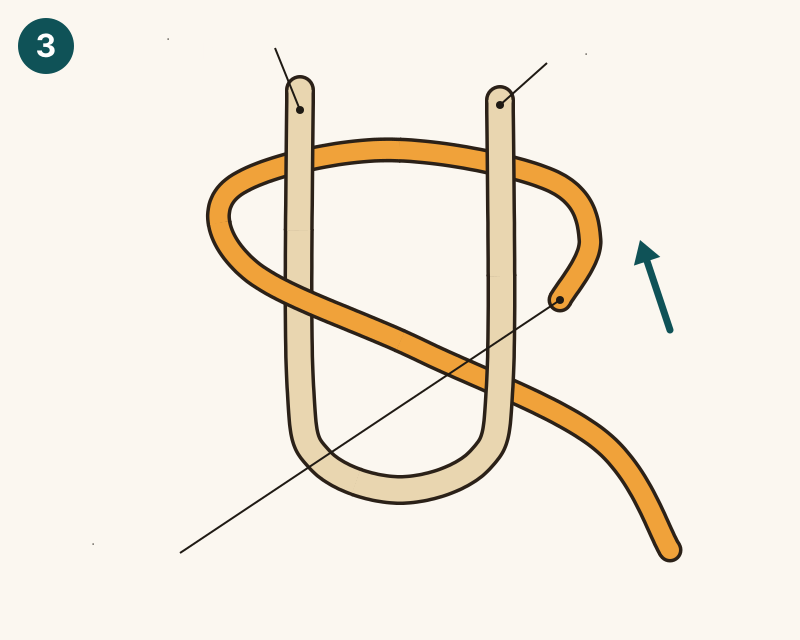
Step 3: Wrap behind both legs
Carry the working end around the outside of the bight and behind both its legs. Leave the turn loose for the tuck.
-
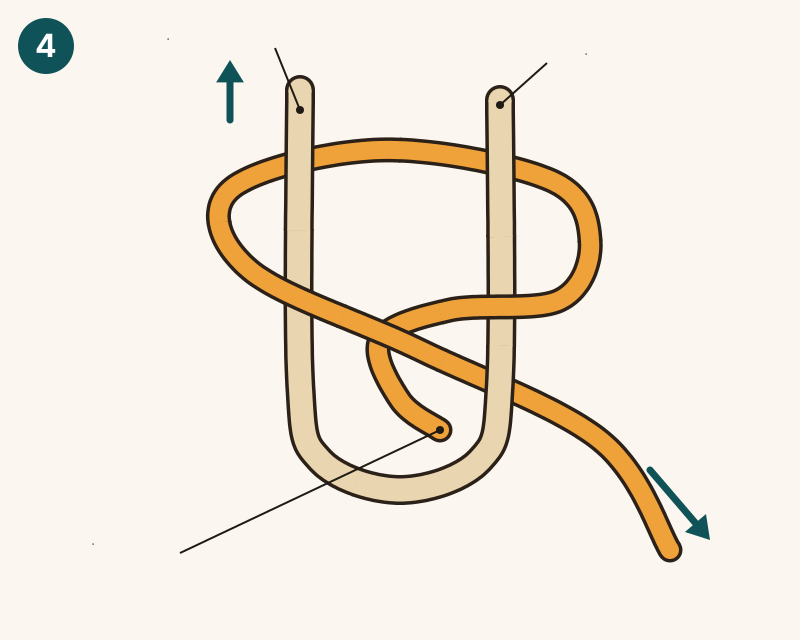
Step 4: Tuck under itself and set
Bring the end over the right leg and under its own first crossing strand. Leave the tail on the same side of the knot as the thicker rope’s tail. Snug all four parts, then pull the standing parts to set it.
What the Sheet bend is used for
Strengths and weaknesses
Tips and common mistakes
Tips
Common mistakes
Variations
Related knots
- Square knot — For binding around an object, not joining loaded ropes.
- Bowline — A fixed loop with related structure.[2]
- Double fisherman’s knot — Another rope-joining knot; choose for the application.
Frequently asked questions
Can it join ropes of different thickness?
Yes. Fold the thicker rope into the bight.[1]
Can I use equal ropes?
Yes; either rope can form the bight.[2]
Where should the tails finish?
On the same side of the finished knot.[3]
When would I use the double version?
An extra wrap is useful when the ropes differ markedly in size.[1]
Sources
- Sheet bend — Animated Knots by Grog — tying sequence, uses and cautions
- Sheet bend — Wikipedia — structure, limitations and Ashley numbering
- Sheet bend — NetKnots — instructions and checks
Last reviewed: